Showing posts with label sewing. Show all posts

Monday, April 9, 2012

Baby Quilt

The semester is winding down, so there's just assignments and exams left and right. I needed a break today. My partner for one of my classes is expecting their child Friday, so I thought I'd do something nice and make a small quilt for the baby. I've been wanting to make a quilt for some time and this was as good of a time as any. (Also a small one to get started with!)

I stumbled across this tutorial and decided to go with it. The Road Trip Quilt from Cluck, Cluck, Sew. As it says, it really is a great quilt for a beginner.

I picked up some fabric this afternoon and got started as soon as I got home.

I didn't want too many different things going on, so six felt like a pretty good balance. This owl fabric is so cute. Look at it. Look.

From starting to cut the fabric to finishing putting the top together, it took me maybe 2 hours max. It wasn't that bad, really. A bit of shuffling pieces around so not too many were clustered in an area. A few steps later, the quilt was done. Nothing too fancy. Maybe another 2 hours. How do people feed blankets bigger than this through their machine?


It's a good thing this is crib sized.... Because I kind of want to keep it. If it were big enough for my bed, I probably would.

Friday, September 9, 2011

Current Events

I have been enjoying everything I've been doing lately, even if it isn't everything I want to do.

I've picked up learning a little about photography and post-processing. I'm an amateur by far, but it's very satisfying.


Shooting anything and everything at my parents' house is a joy - there are so many plants, flowers, and critters.


Found this wondeful brocade at Jo-Ann that I plan on using in some purses, if I find the time. Hopefully, I find the time. It's gorgeous and it was so hard to pick just one brocade of all the ones that were there.


I made a box bag pouch for someone and just loved the project. It's so simplistic and took maybe an hour start to finish, including the hand-embroidery I did.


I mostly used this tutorial, but there's a half dozen other great ones out there.

It's a great quickie project if you're looking for one. This specific sized bag was something like 8in x 4in x 3in in the end - I don't remember exactly. Regardless, it's a good size for a make-up bag or a travel bag for toiletries. Stow away all your little sewing bits and bobs. Anything. :D


Thursday, June 23, 2011

A couple projects

Umbreon
Head, ears, tail, feet stuffed with polyfill, body filled with plushie beads. Hand stitched on the yellow detail cut from fleece. Felt eyes with acrylic paint detail. Hand-sewn nose.


Jolteon

Made this one back in January when my beau came down with a flu and I thought he needed a friend. The white parts are cut from a pair of old socks. :D  I had a terrible time with this because at the time, I didn't have any fabric scissors so cutting was just absolute hell. As a result, some pieces turned out funny - the face, for example, is a little derpy.


Original plushie design by: renegar-kitsune


"Bonsai Bag" purse

Canvas material inside and out; I love this thing. It helped me figure out zippers.


Pattern by Rae at http://www.made-by-rae.com/

Monday, December 20, 2010

Dice Bags

It was a spur of the moment idea but I kept with it and just LOVE how they turned out.


I wasn't sure what to give my fiancé's brother, but wanted it to be something useful. As the both of them love Magic: The Gathering, I usually use that as a starting point. Last year, I made a full set of mana symbol pendants for my fiancé and an island symbol pendant for his brother. My fiancé loves his set and frequently wears them.

I somehow decided on dice bags (or whatever-else-they-want-to-put-in-them bags). I used the same thing I used for my steampunk goggles for the outside - that is, a black canvas apron to give a different life, but I also wanted to make the lining of each bag different. I used various scrap fabrics we have lying around here and love how all of them came out.

First and second
Marbles are great.

My first attempt yielded a bag I thought was a little small, but it's actually perfectly suited to hold a standard set of dice. Its small size only really made sewing the top difficult. I was pleased to find we still had this particular bit of fabric left because its pattern is just a lot of ocean waves, which I thought would be perfect for my fiancé's brother because he loves playing blue decks.

Second
I know for a fact my dear beau would love to have a dice bag, especially to go along with the bag I painted for him for his birthday that he now uses for all of his MtG stuff. He loves anything green, so I used some green satin from my Bellossom costume to line it. I absolutely love how the satin looks.

I wanted to use the black canvas because I felt it would make them more durable.


Black satin and some red fabric joined in on the party.


Additionally, I used some old shoelaces to string them and decided I needed to make some kind of bead real quick out of polymer clay with two holes to run the laces through, then tie a knot to tie off the bag so that the knot wouldn't slip into the channel they're strung through and be impossible to untie again. (I'm aware this sentence is a massive run-on.)

Monday, December 13, 2010

Teddiursa Hat

Well, my fiancé took my foxy ear hat I made hostage and refuses to give it back. Except - however - under one condition: He wants a teddiursa hat. CAN DO!


It started off the same as my foxy ear hat, but with rounded ears instead of pointy ears.
The Ackbar says: It's a TRAP!
But most importantly and identifying about Teddiursa is the forehead-moon. I'm still working on how I can best sew details and things on. I used a wider zig-zag stitch for my Luvdisc plushies (Which I suddenly realize I don't think I made a post about) which worked but I'm not sure if I was 100% satisfied with it. I used a much narrower zigzag on the moon and tried to stay close to the edge of it, then doubled back over it again. I'm relatively pleased with the outcome.

It's... a HUGE moon.

I also pinched the ears in the middle and stitched it. Just cause. :>


I hope he loves it. <3

Saturday, December 4, 2010

Yeah, it's that unfortunate time of the year again

I'm not a fan of "the season" - since it's people that ruin the whole thing for me. People everywhere, not minding people around them, being rude and impatient in stores. Parking lots. Check outs. Roads.


Alas, I still like to make ornaments - regardless of if I have a tree or not.

Little presents.

These are sort of fun. Made from felt, stuffed with poly-fill and some polybead things for like... beanie babies for some added weight.

Yay!
I'm currently doing some green ones and some gold/purple ones. ^_^


These buttons are gorgeous. And old.
I also whipped this tree up.

Monday, October 18, 2010

Costumery - Steampunk Goggles

I will attempt to explain in absolutely terrible detail how I made my lol-goggles.


Tutorials I've found on the interwebz:
http://mtani.deviantart.com/art/Steampunk-Goggles-Tutorial-105778289

http://fenris-the-red-wolf.deviantart.com/art/Steampunk-Goggles-A-Tutorial-91226763
http://raegar.deviantart.com/art/Steampunk-Goggles-168441815
These all looked great, but...

Yeah, okay. So while I wanted leather and metal, the whole nine yards (or at least four and a half yards would have been nice), I didn't have many things on-hand to futz with. I did however have a pile of polymer clay, some spray paint from my NERF gun repaint, and some old aprons and felt. ...And a toilet tissue roll. The heck did I do with this crap?

Pile of junk.

I cut two pieces from the cardboard roll the be the base of my eyepieces. Maybe an inch wide. I reinforced these with masking tape so they wouldn't be so flimsy, before rolling a sheet of polymer clay around the outside and trimming it to fit. (I ran the clay through my pasta machine so it'd be uniform.)
The fronts of the eyepieces still had to be made. I rolled out more clay and used something (in this case, an old salt shaker cap) to cut out circles from the middles, where I would later put in clear plastic for lenses.
Around the opposite edge, I poked holes through before baking where I'd later stitch.

Or something like that.
I don't care how the inside looked. Baked this per package instructions. Let cool, then applied a few coats of spray paint. I spent the time it was drying to dig around the house for some kind of fabric to use in lieu of leather.


This one was a huge ugly "No."
My wonderful mother however pulled up a pile of aprons she doesn't use for work anymore. Essentially black canvas (And an adorable red one I'm keeping) just waiting for me to decimate it.   I cut a rough "Whale" shape (As I saw it described in one of the aforementioned tutorials - I think that sounded adorable.) and trimmed it down how I wanted for comfort. I DIDN'T THINK THIS WAS ENOUGH THOUGH! It needed more color. I managed to dig up my old collection of craft felt. I cut a matching piece from it and put them together. I wrapped these two pieces around the now-dry eyepieces, and using the previously poked holes, I stitched (repeatedly) through the fabric and eyepieces to secure them together.
Like this.
Repeat for the second eyepiece.
I managed to find some clear plastic from some product's packaging. I cut circles from it to use for lenses and trimmed the edged down until they sat inside of the eyepiece snugly (from the inside. This is why I previously stamped out circles, leaving a place inside for the lens to rest).

As for the rest of the goggles' assembly, I used a scrap to join the eyepieces in the middle as a noserest or something. I cheated by using the adjustable strap from the apron as the strap for the goggles.


These look freaking goofy if I actually wear them on my face, but my main intent in making them was to wear on my hat.

HURR HURR HURR DURP DURP

Thursday, October 14, 2010

Haunter hat completed!

I have finished the Haunter hat I mentioned in my previous post! It looks much better than it did initially and I'm much happier with the result, as is the friend I made it for. I went on and added a pink mouth instead of trying to make the band around the hat into a mouth, which greatly improved how it looked. It also made the eyes look less stupid with something else hand-quilted/sewn on with them.

Once again, BLEHHHH!
I must say (again) that the aspect I'm probably most unhappy about is the spikes not being big enough. That is something I'll have to improve if I make another one of these.

Monday, October 11, 2010

Pokemon Overload. Maybe.

There is never a Pokemon overload.


I finished my Kanto gym badge set. All eight badges: Boulder, Cascade, Thunder, Rainbow, Marsh, Soul, Volcano, Earth. They weren't necessarily hard. Rainbow was time consuming in that I had to mix all of the colors. Cutting Thunder's shape right sort of sucked too.


I'm thrilled with how these turned out, sans the whole hex vs octagon issue.
Next up was... My best buddy asked that in addition to the Bellossom plushie I made for him that he would like a Gastly to hang in his car. Hell, why not?

Say hi, Gastly!

I did not make the Pikachu - he was purchased. ^_^
I'm extremely pleased with how they have turned out and currently have four of them sitting here with me. I sort of like it without the hanging loop, but as they are ghost pokemon, I figure they need to be suspended somehow. The bodies are fleece, faces are felt, and poofs are tulle. Machine and hand sewn. Some hot glue for facial attachment.

Also, the Bellossom are all felt. Machine and hand sewn. Hot glue for the face and flowers. Skirt petals all hand sewn on.


I, some time ago, made a Gengar figurine for a friend of mine with promise that I'll one day sell it to him when I was ready to relinquish him. Darn attachment I have formed with him. Gengar gave me much grief when the gloss I used to coat him turned into a swirly orange weirdness, causing me to repaint him and purchase a different glaze. I love how the backside turned out. He stands easily and even holds a berry of some flavor.

Gengar made from polymer clay
This friend wants a Gastly as well, but .... What good is Gastly and Gengar if you don't have a Haunter?


Commence concept sketch.
bleh?

I nixed the tail and found out I'm terrible with anything that has a corner and needs to be turned out. .... That is to say, all of the spikes. They did not turn out nearly as spiky or large as I wanted. Also, I should have gone with the top mouth design instead of the bottom.

I mean, in short. This thing eats my head.

BLEHHHHHHHHHHHH!
I've since added the eyes, which are felt and hand quilted on but I don't even like that. It's going to be up to him if he wants the hat or not. If not, I'll probably rip it apart and change it up some. I'm not sure. The band around the bottom is too wide. Fffffffffffffffffffffffffffffff.

Thursday, October 7, 2010

Costumery - Steampunk Mechanic


I went to Dragon*Con last month for my first time! Good times. The guy I went with (and by association his two friends) wanted to be all Steampunk. Firstly, I think steampunk is fascinating in itself. That is to say, in literary works such as things Jules Verne or HG Wells. Some of the theory behind it, too. Also... the Victorian style is gorgeous. HOWEVER that doesn't mean I want my life to revolve around steampunk dress and tech, as well as the nonfunctional, totally decorative, randomly pasted gears. Disclaimer: I'm neither bashing steampunk, nor the people who love it. As I said, I think it's fascinating in some respects.

That being said: He wanted to be a steampunk skypirate captain. I blurted I'd be his mechanic because every ship needs a mechanic, thus weaving myself into a trap. But okay, I wanted to make some kind of costume and I wanted to go, so if I had to appease the person by playing along with his costuming so I could bum a ride to Atlanta, I would.

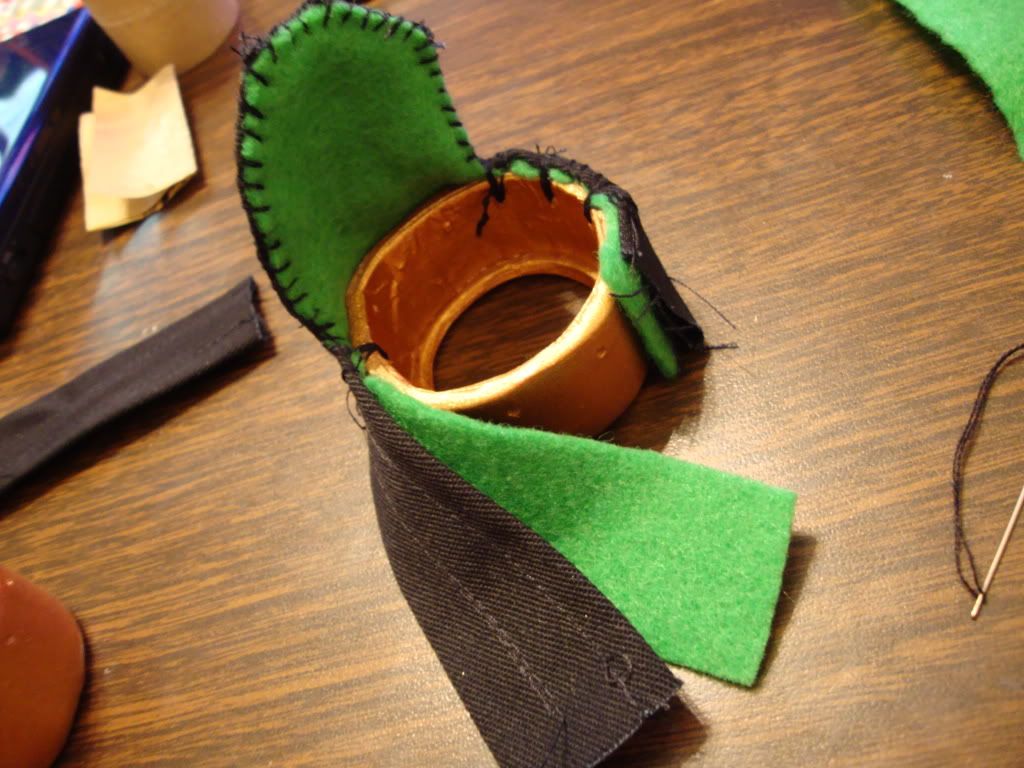
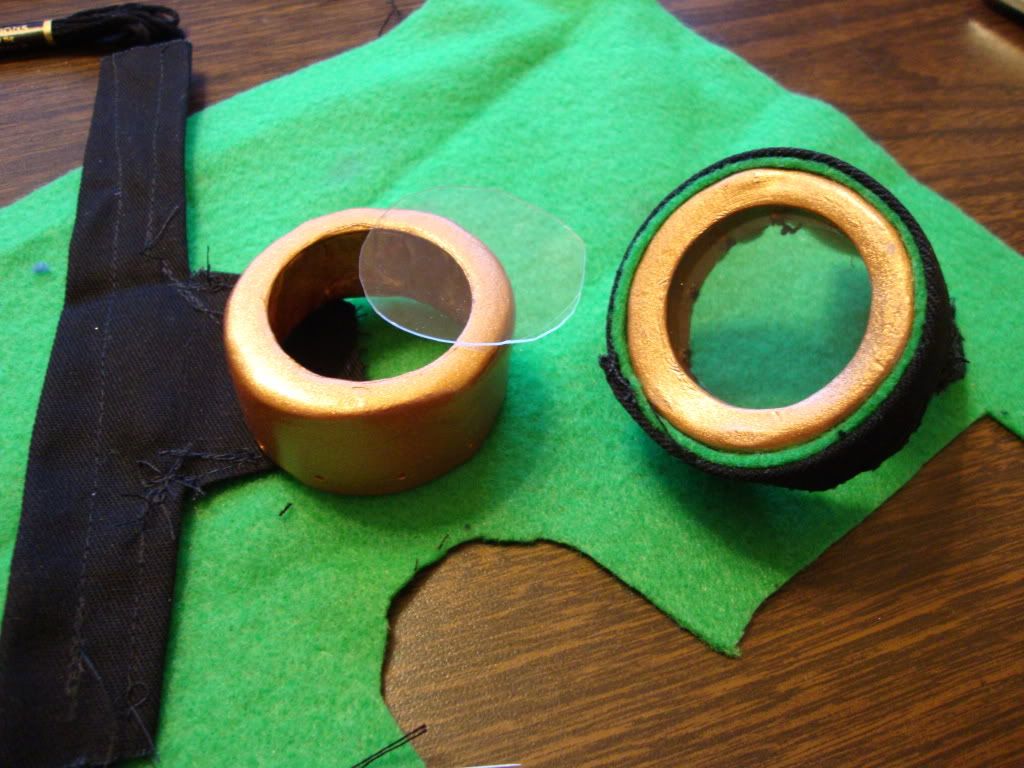
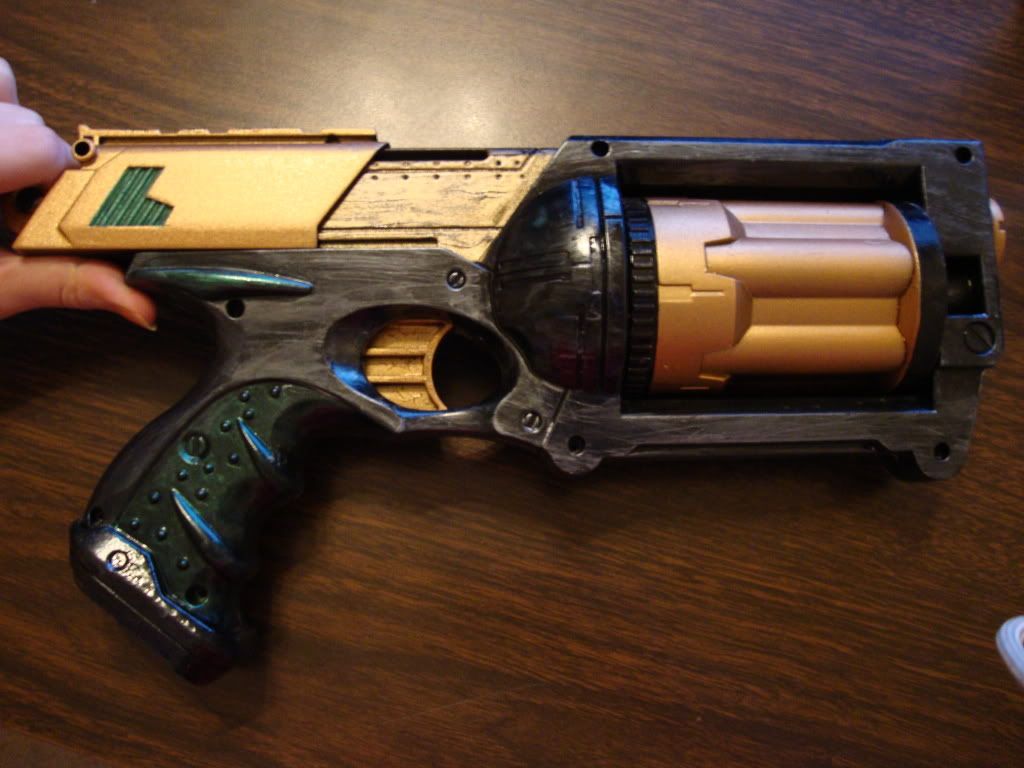
Well, I didn't get into my costume hardcore mostly out of I didn't have money to embellish it how I wanted. I made due with what I had. Either way, I rough sketched the character. I had to deviate from my sketch as I progressed, of course. Things I had to create: Obligatory goggles (Although I find it more appropriate as a mechanic who would actually 
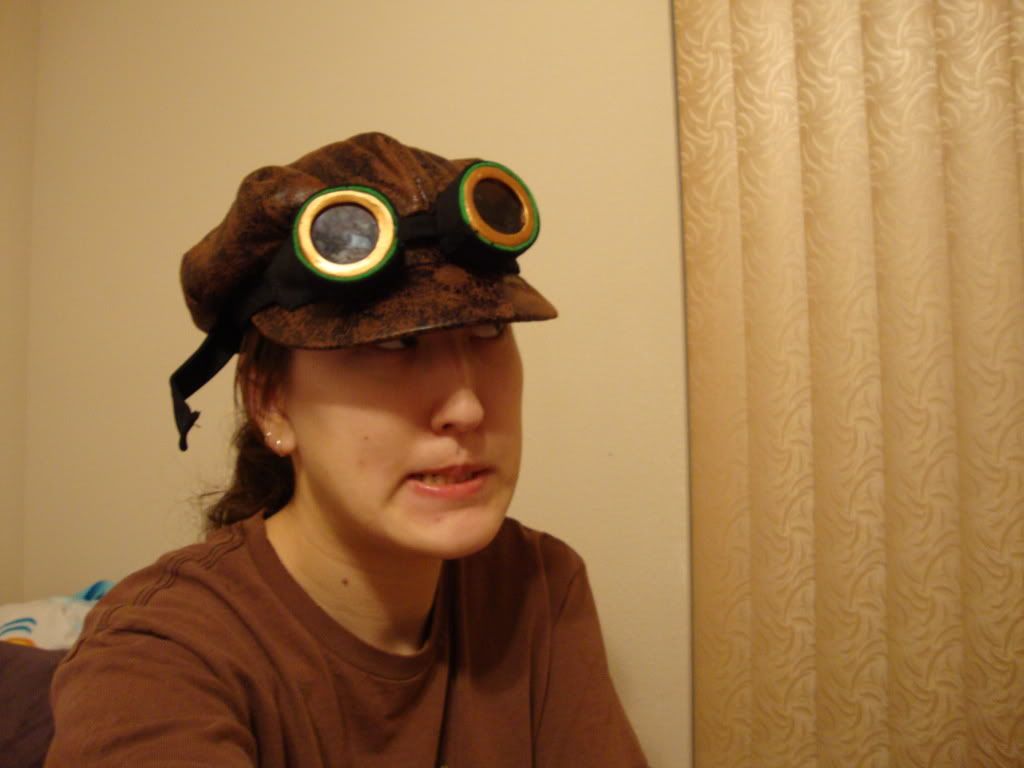
need goggles), a firearm, holster for said firearm, work belt, a big wrench. Minimum. Things I had or recently purchased: Vest, shorts, shirt, boots. Appropriate hat was necessary and Google serviced me well in that respect. Newsboy style cap that even looked slightly weathered.
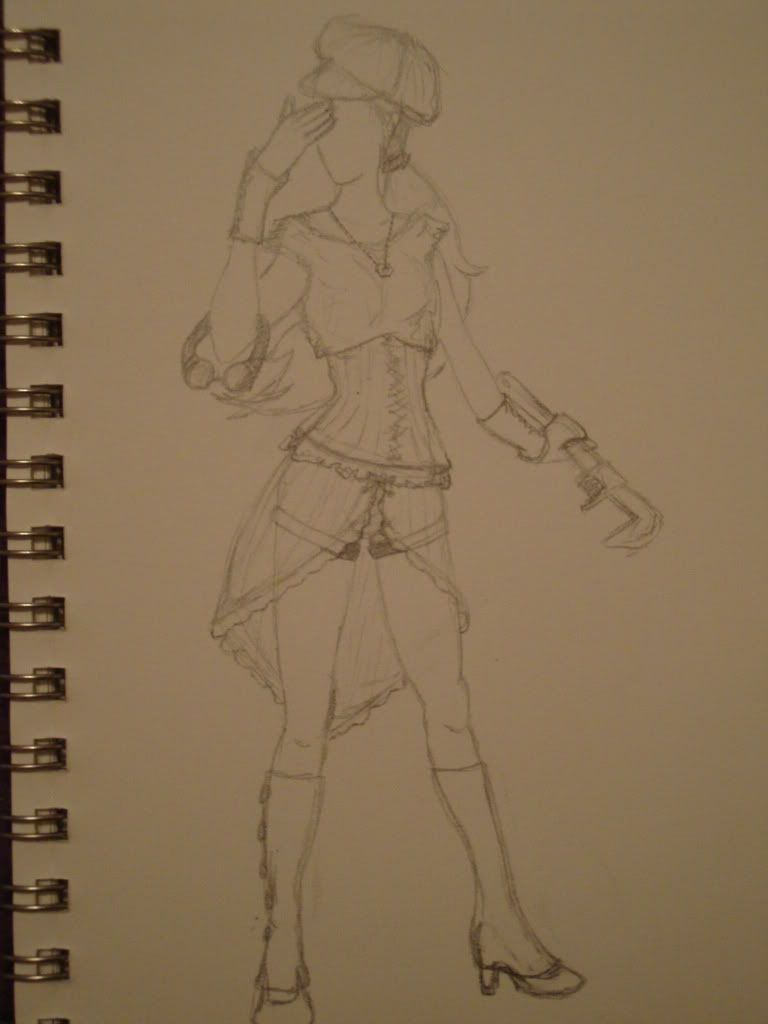
Original sketch
I may make separate posts for ... like... creating my props and such because there were several components.
I didn't get around to making spats because I wanted such high spats and sewing is, still, beyond me. I didn't make any bustle or skirt-thingy. The waist cincher from the sketch wound up being my vest instead. Did a plain wrench instead of a monkey wrench. Couldn't find a leather I liked for bracers, so didn't do that.

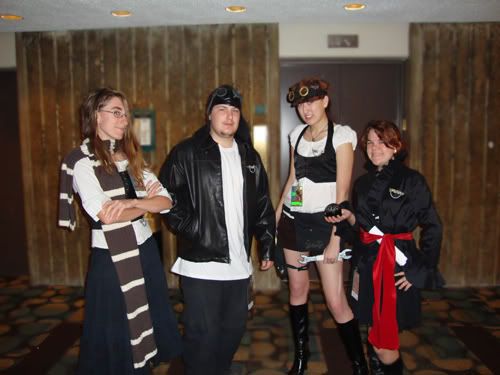
"Chef", Captain, Mechanic, Navigator
No offense or anything intended, but you better believe next time I costume in a group that I'm going to make sure the group is reliable. He at least had the jacket, hat, and goggles thing going on. But really. Really. I'm not finding a flavor of steampunk elsewhere.

Anyway, I didn't pull off my costume entirely how I wanted. I was also too stupid to unholster my gun for any pictures, which is regrettable.
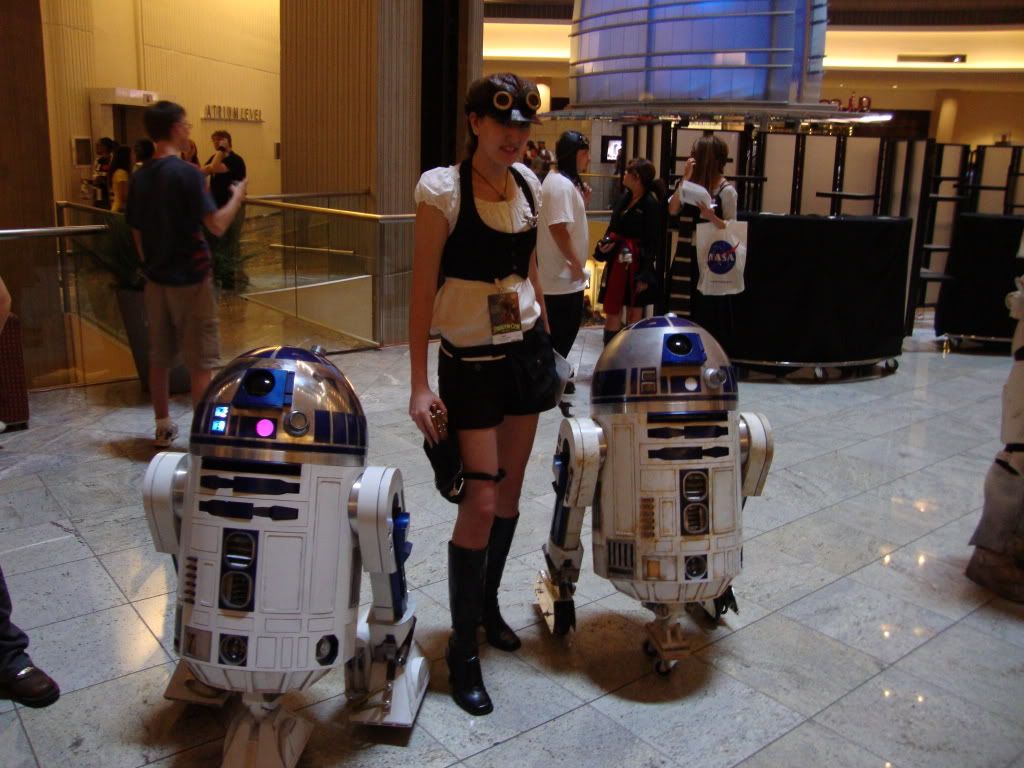
Except I found two R2D2s.
Also, not wearing these boots for another 18 hour stretch of constant walking. I thought I had made them more comfortable, but alas. Need new boots with less heel for future costumes. Boots are so multipurpose. (I did want lace up walking boots for this, but again - no money.)


Whatever.


Also, if anyone on the interwebz happens to see a picture of me in this costume that someone took, I'd love to see it. :< I know a couple people took pictures. Not many, but a couple.
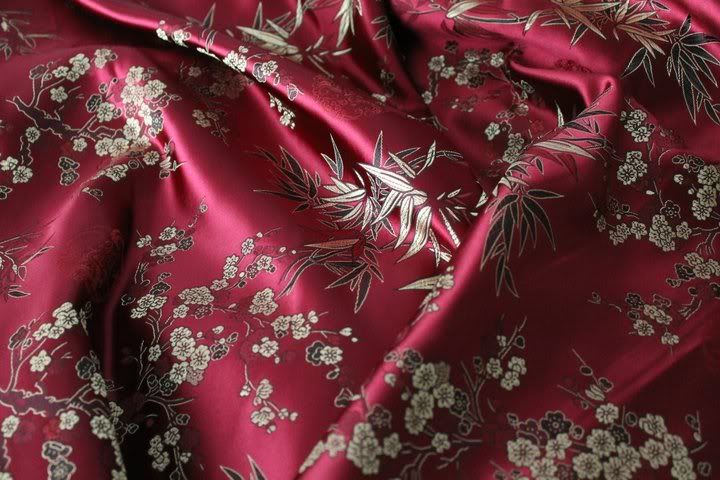